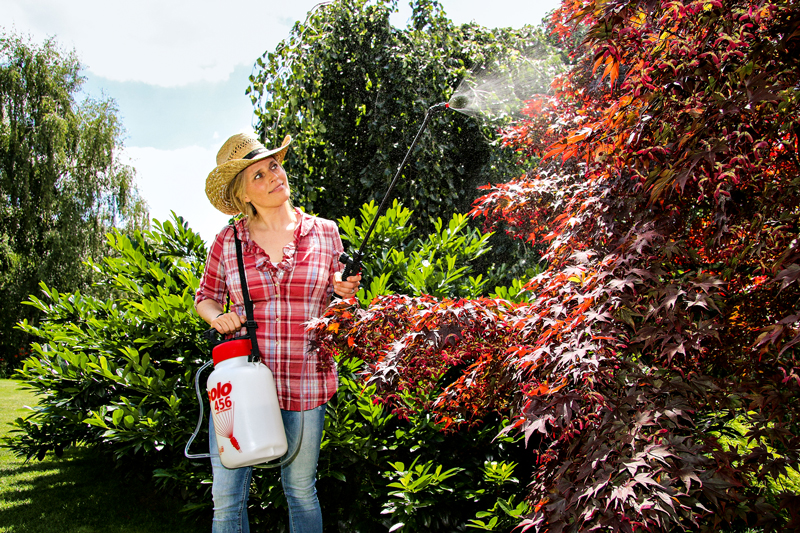
Commissioning and decommissioning for SOLO products
Perfect tools for any job.
Pressure sprayers from SOLO
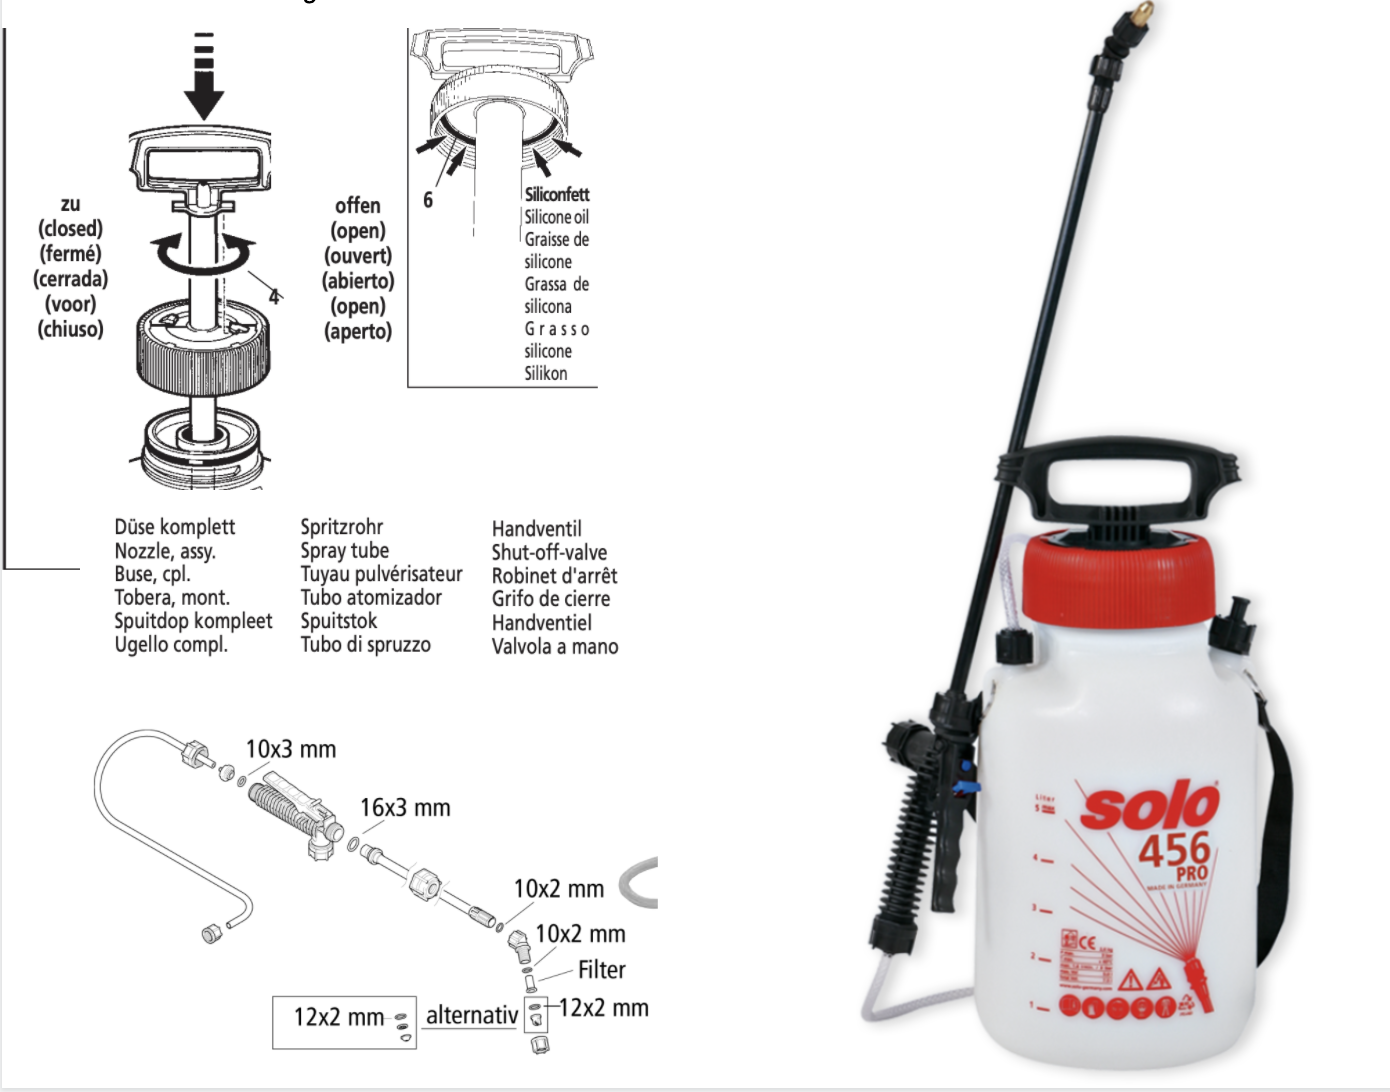
Press the pump handle down and then turn it to the left. You can now remove the pump and fill the spray liquid to the maximum mark on the unit. Please note the exact specifications of the spraying agent manufacturer. You can now mix the liquid well and tighten the pump again. Next, pump until the red colour marking appears on the safety valve. When this happens, press the manual lever to initiate the spraying process. When you release the manual lever, the spraying process stops. When you want to open the container again, pull the safety valve first to release the pressure.
Please clean the sprayer carefully after each use. To do this, you just have to open the unpressurised container, rinse it out with clear water and clean it. Please do not use aggressive cleaning agents such as cold cleaner or thinner.
SOLO backpack sprayers – powerful and ergonomic for long jobs
Operating instructions for the SOLO backpack sprayer 425
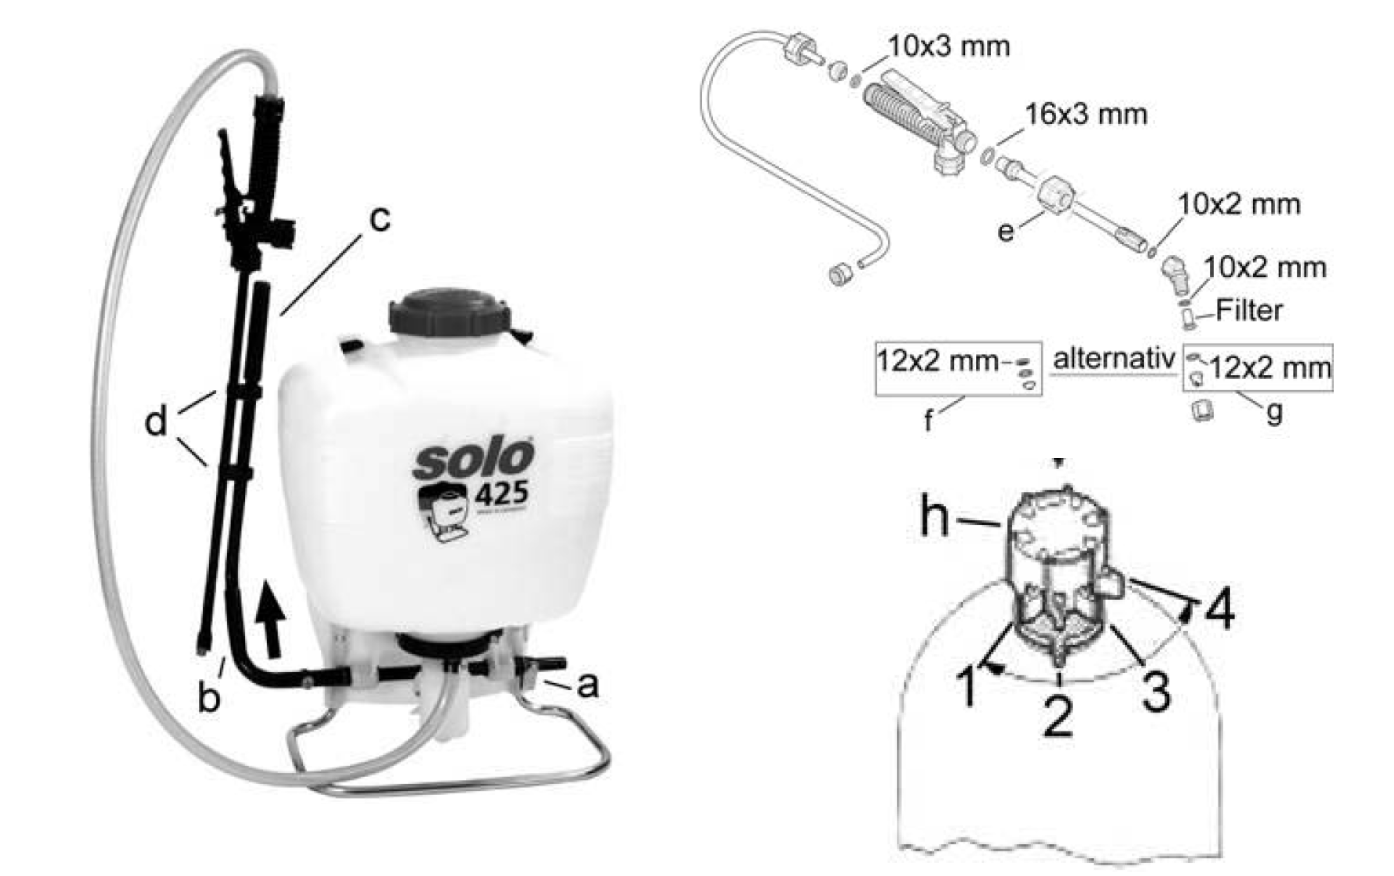
The SOLO 425 is preinstalled except for the lever. You can attach it either on the right or on the left, as required. The lever of the pressure sprayer 425 is pre-installed on the left at the factory → when looking at the container labelling. When mounting the lever, the holder (b) of the lever must point upwards towards the rear. To stop the device, the pump lever (c) in the holder (b) can be turned upwards and the spray wand hooked into the two clamps (d). When you want to use the pressure sprayer again, turn the pump lever (c) in the holder (b) back down.
The spray wand is attached to the manual valve by tightening the cap nut (e).
To regulate the quantity, the spray pressure can be adjusted in various stages, somewhere in the range of 1 to 4 bar.
Which nozzle is best for shrubs and trees?
If you want to treat shrubs or trees, the nozzles with a hollow cone spray pattern (f) are the best choice. For normal surface treatments we recommend the flat spray nozzles (g).
How does the pressure setting work?
The pressure can be adjusted before filling the spray liquid by turning the adjusting cap (h) above the marking on the air chamber.
Important: Do not fill the container beyond the maximum mark.
Quickly move the lever to prime the pump and open the shut-off valve by moving the manual lever. Only the spray liquid is sprayed through the nozzle from the filling aperture. Releasing the manual lever immediately interrupts the spray jet.
Battery-operated sprayers for professional use
Assembling the SOLO battery-operated sprayer 416 Li
Assembling the spray wand and nozzles
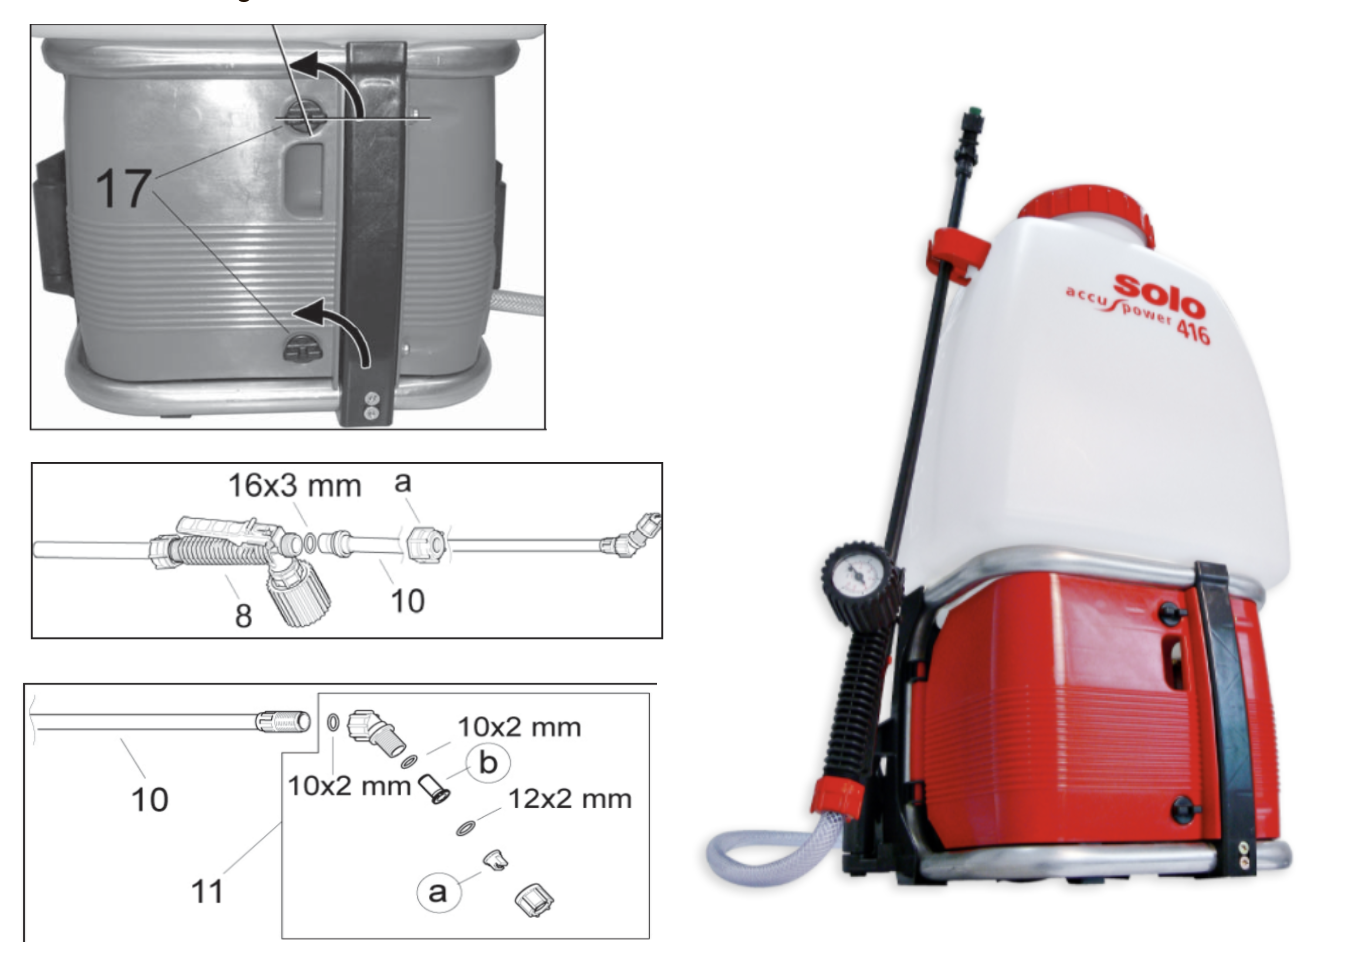
The spray wand (10) is sealed to the manual valve (8) with the O-ring 16x3 mm. You can now screw the cap nut (a) onto the manual valve by hand. When you are not working, attach the spray wand to the holder.
Now screw the nozzle attachment (11) with the 10x2 mm O-ring to the spray wand until it is hand-tight. A flat spray nozzle (a) is fitted as standard in the factory.
A ball valve filter (b) is fitted in the contra-angle fitting in front of the spray nozzle to minimise dripping from the nozzle when the manual valve is closed.

